Shrub Removal & Crumbling Garden Walls: DIY or Pro?
Overgrown beds, weed trees, and crumbling garden walls? Learn when to DIY, when to call a pro, and how to plan a small multi-part landscape project efficiently.
When Overgrown Beds Turn Into a Bigger Project
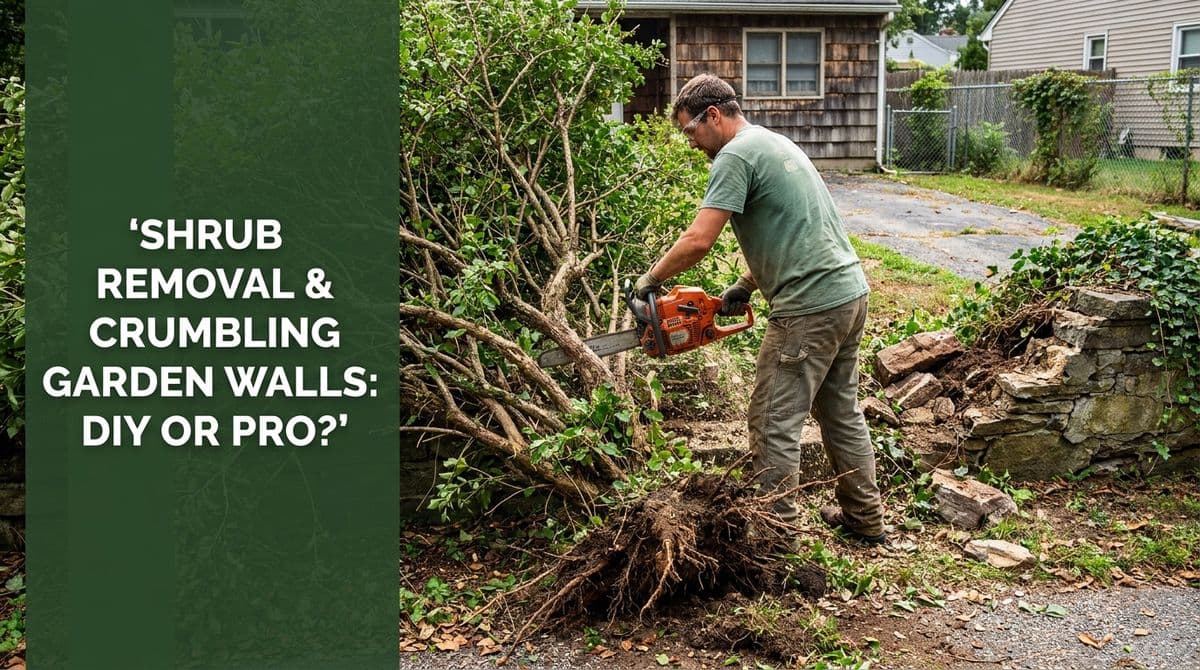
We recently got a call from a homeowner — let’s call her Karen — who sounded a lot like many of the folks we talk to in late spring. She said, “It’s a couple of different types of projects. There’s shrub removal, some brush cleanup, something weird growing inside a shrub, and then a tier in our garden wall that’s crumbling.”
In other words, one of those situations where the landscaping has slowly gotten away from you, and now it feels like three projects all tangled together: overgrown beds, invasive “weed trees” popping up in shrubs, and a failing tiered wall.
We walked Karen through what could be a DIY job, what really needs a pro, and how to plan everything so she didn’t have her yard torn up all summer. I’ll share that same guidance here so you can tackle a similar multi-part project with confidence.
DIY vs. Pro: How to Decide on Shrub & Brush Removal
Let’s start with the shrubs and brush. Karen had one shrub that needed to be removed completely, plus some mystery “weed-type” growth coming up through others.
DIY shrub removal can make sense when:
- The shrub is small to medium (generally under 4–5 feet tall).
- The roots are not entangled with irrigation lines, utilities, or a retaining wall.
- You have basic tools: loppers, pruning saw, shovel, and gloves.
- You’re comfortable lifting, hauling, and making a few dump runs or bundling brush for pickup.
In those cases, you can usually cut the shrub back, dig around the root ball, and lever it out with a shovel or digging bar.
You should consider calling a pro when:
- The shrub is large, old, or has an extensive root system.
- It’s near a structure, fence, or that crumbling wall you’re worried about.
- You suspect utilities nearby (always call 811 before digging).
- You see “weed trees” like boxelder, buckthorn, or volunteer maples growing through the center.
Those hidden “weed trees” can be tougher and more stubborn than the original shrub. If you just cut them at ground level, they often resprout even stronger.
How Pros Safely Remove Shrubs & Invasive ‘Weed Trees’
When we handle a situation like Karen’s, we approach it in layers:
- Identify what’s what. We separate the intended plant (the original shrub) from the invaders (weed trees, aggressive vines, or suckers). That tells us whether we’re saving the shrub or taking the whole thing out.
- Cut back in stages. Instead of just hacking everything to the ground, we prune branches down to manageable sections so they’re safer to remove and easier to haul away.
- Expose the base and roots. We clear soil and debris from around the trunks so we can see where roots are going and avoid utilities, edging, or wall footings.
- Remove or kill the weed tree properly. Depending on species and location, that might mean digging out as much root as we can, or cutting and carefully applying a targeted herbicide to the fresh stump so it doesn’t keep coming back.
- Grading and cleanup. After removal, we rake, level the area, and haul away debris so the space is ready for its next use — fresh plantings, rock, or simply open lawn.
This method protects nearby plants and structures, and dramatically reduces the chance that the “mystery tree” returns next year.
Why Tiered Garden Walls Crack, Lean, or Crumble
Karen’s second concern was a crumbling tier in her garden’s retaining area. On our website, she’d seen a picture of a similar wall failure and said, “We have that!”
Most tiered garden walls fail for a few common reasons:
- Poor base preparation: The soil under the wall wasn’t compacted, or there was no proper gravel base, so the wall settles unevenly.
- Improper drainage: Water builds up behind the wall because there’s no drain tile, weep holes, or clean stone backfill.
- Undersized or lightweight blocks: The block used wasn’t designed to hold back the height or weight of the soil.
- Tree roots and frost: Roots and freeze–thaw cycles push on the wall, causing bulging and cracking over time.
What you see on the surface — loose caps, cracked or leaning tiers, missing mortar — is usually a symptom of one or more of those underlying issues.
Wall Repair vs. Full Replacement: How We Decide
When we look at a wall like Karen’s, we’re asking one main question: Is the structure basically sound, or is it failing from the ground up?
Repair might be enough when:
- Only a small section has shifted or cracked.
- The wall height is low (typically under 3–4 feet).
- The base and drainage are mostly intact.
- The blocks themselves are in good shape and still available.
In these cases, we can often carefully disassemble the problem area, rebuild the base, improve drainage behind that section, and relay the original block.
Replacement is usually smarter when:
- Multiple tiers are leaning or bowing out.
- There’s no proper base or drainage behind the wall.
- Blocks are crumbling, or the system was never designed as a retaining wall.
- Previous “patch” repairs have already failed.
Yes, replacement is a bigger upfront investment, but it often costs less over time than repeatedly patching a fundamentally flawed structure.
Planning a Multi-Part Project Efficiently
Like Karen, a lot of homeowners end up with a to-do list that looks like: 1) brush removal, 2) wall repair, 3) convert a garden bed to open space. Done in the wrong order, you can create extra work and mess. Here’s how we like to plan it:
1. Start with demolition and removal.
Clear out the shrubs, weed trees, and any plants or edging that will be in the way of the wall work. It’s easier — and cheaper — for us to dig and rebuild when we’re not working around overgrown plants.
2. Address the structural issues next.
Repair or rebuild the crumbling tier before you refresh the beds. Heavy equipment, soil movement, and compaction should all happen before new plants, mulch, or decorative rock go in.
3. Finish with bed conversion and planting.
Once the wall is solid and everything is graded, convert that old bed into whatever you want next: lawn, low-maintenance rock, pollinator garden, or a simple open space. At this stage we talk about:
- Sun vs. shade and what will actually thrive.
- How much maintenance you realistically want to do.
- Edging, mulch, and fabric choices to help keep weeds down.
When You Need an On-Site Walkthrough
On Karen’s call, she said she wanted to be home during our visit to “point out all the different stuff.” That’s exactly how we prefer to do estimates. With multi-part projects, seeing everything in person means we can:
- Clarify which shrubs stay, which go, and which might just need a hard prune.
- Inspect the wall from top to bottom and behind, not just the visible face.
- Talk through phasing if you want to do some DIY and hire us for the heavier work.
- Give you a realistic timeline and a clear, itemized estimate.
If your yard sounds a bit like Karen’s — overgrown shrubs, a few “mystery trees,” and a garden wall that’s seen better days — you don’t have to fix it all at once or all by yourself. Start by deciding what you’re comfortable tackling, then bring in a pro to make sure the structural pieces are safe, solid, and built to last.